Header Setup
Molla currently offers 7 header layouts to choose from, each with its own unique design and set of options. There are several options to customize the header, as well as the content within it. Please read below to learn how to setup the header.
Step 1 – Navigate to Molla > Theme Options > Header to access the header options. You will see 7 main sections; General, Logo & Site Identity, Header Builder, Header Top, Header Main, Header Bottom, Sticky Header. See below for information on what each section contains.
Step 2 – Expand the Logo & Site Identity section and select your site logo & identity. Retina logo for high-resolution desktops and several logo options are here.
Step 3 – In General section, set global header options. Header width, select header row to make side header, use or not position-fixed header.
If you’ve set site logo and global header options, header contents’ need to be set. See below for more information.
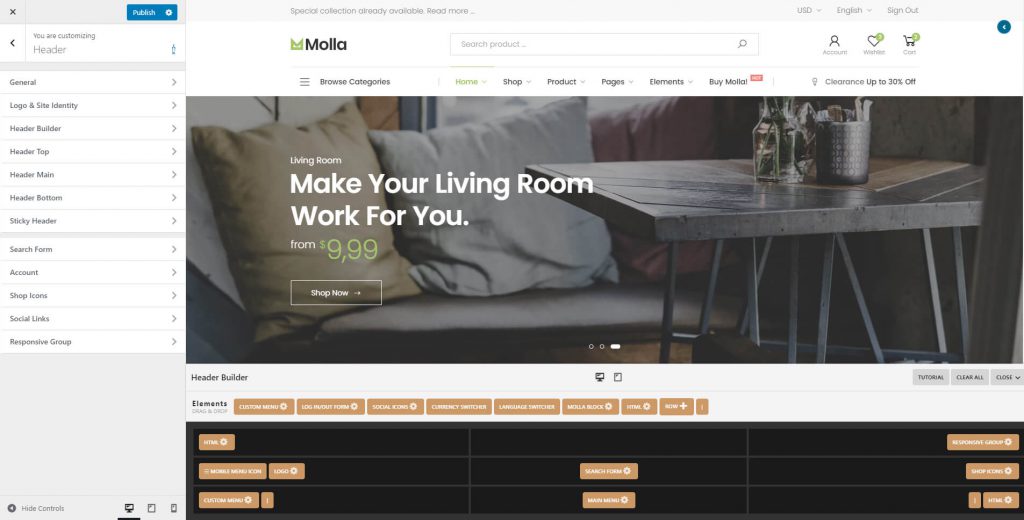
Step 4 – In Header Builder section, set your header contents. You could use offered header layouts or build your own header content & layout. About Header Builder.
Step 5 – Expand the Sticky Header section and set sticky header rows & style.
Step 6 – Once complete, click the “Publish” button.