WooCommerce
Molla is fully compatible with WooCommerce and includes full design integration. To get started with creating your online shop, you need to install the free WooCommerce Plugin. This documentation on using WooCommerce is the very basic information you need to get started. Please take a careful look at the important links below.
You can see more details with woocommerce documentation.
Install WooCommerce Pages
If you want to import one of our WooCommerce demos. You can skip this.
You can see the following message after installing WooCommerce plugin and you should click Install Woocommerce Pages.

Create Your Products
After installing WooCommerce plugin, you can see ‘Products’ menu on your WP Admin sidebar.
-
Go to the
Products > Add Newa on your WP Admin sidebar. -
Enter the name of your product at the top of the page.
-
Enter the product description text into the post content field. This section will display all the product information.
-
In the ‘Product Data’ box, enter all the product details. For example, Price, SKU or Shipping.
-
In the ‘Product Short Description’ box, enter a short description that will be displayed next to your main images.
-
Set your main featured image under the ‘Product Image’ box on the right hand side. This has to be done for every product.
-
To use a gallery of images, insert more images in the ‘Product Gallery’ box.
-
In the ‘Product Categories’ box, enter your product’s categories. In the ‘Product Tags’ box, enter your product’s appropriate tags.
-
Once you’ve entered all the necessary date, click ‘Publish’ and the item will now appear on your main shop page.
Product Image Sizes
WooCommerce includes settings to change the size of product images for Catalog images and Single Product images.
You can change the product image sizes in Molla > Theme Options > Woocommerce > Product Images on WP Admin sidebar.
If the images you’re uploading for your products are smaller at the source than the image sizes set in your WooCommerce settings, you may see some visual layout discrepancies on the frontend of the shop pages. Don’t worry about it. It is simply because your images were too small for WooCommerce settings to affect them.
After any changes to your image size settings, you’ll need to regenerate your thumbnails for it to affect images already uploaded to your site. We recommend using the Regenerate Thumbnails plugin.
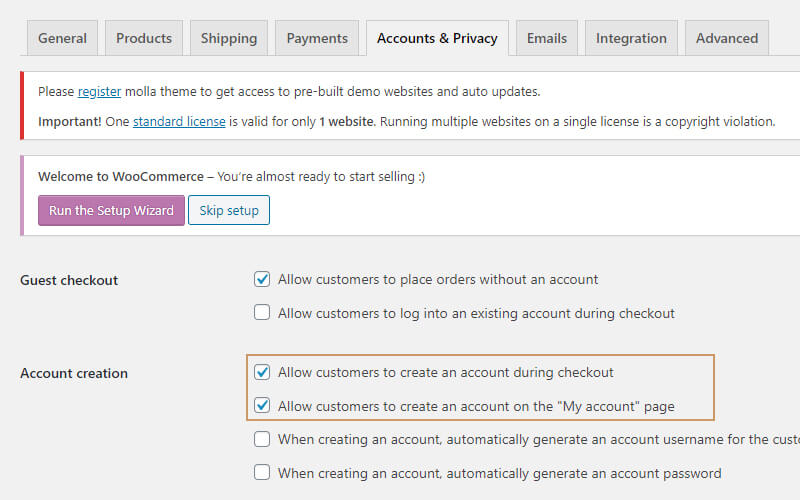
Account Creation
Please go to WooCommerce > Settings > Account > Registration Options and enable registration on the “My Account” page.